Having text displayed in a custom font is an excellent way to brand your app and set it apart from others. In this tutorial, I will take you through the steps to creating iOS Apps with Custom Fonts using SwiftUI. SwiftUI is a declarative way of defining interfaces, with benefits of being able to codify UI changes so that changes can be reviewed and viewed in a VCS, such as git.
Creating Your iOS App Project in Xcode
If you haven’t installed Xcode, you can install it from the App Store on Mac devices. You won’t need a developer license to develop and test on an iOS simulator. But to test on a physical device or to upload to App Store Connect you will need an Apple Developer License.
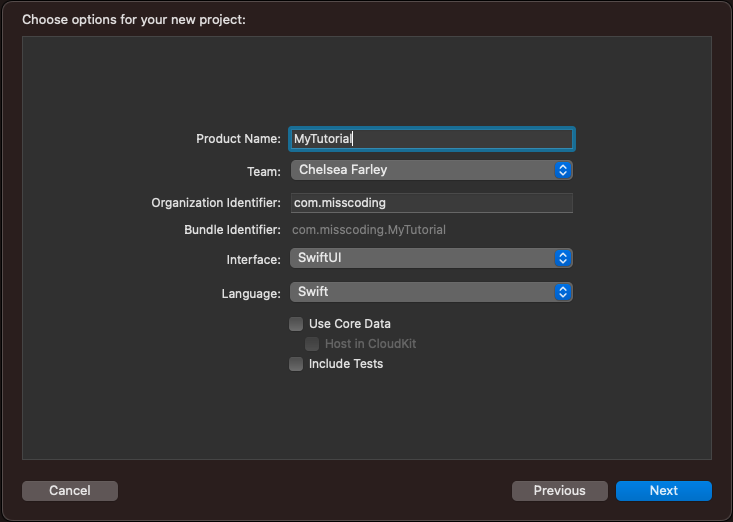
If starting from scratch you will want to create a new project in Xcode, select iOS App and select SwiftUI for the interface, as per the screenshot below:
Select a Custom Font
There are many websites that allow you to select commercially free fonts, some with attribution and some without attribution. It’s worth checking out the licenses to make sure there are no issues there before selecting a font. The font can be used to set your app apart from others and add some depth to your branding. Alternatively, custom fonts can be used to draw attention to certain text. These are a couple of sites that you can use to find fonts:
Add Your Font to Xcode
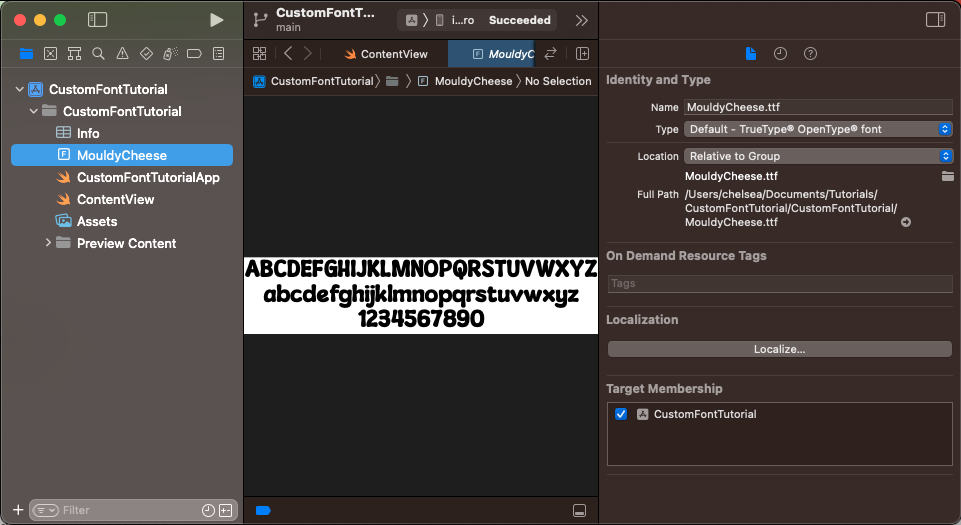
Once you have selected a font. You will want to add it to Xcode and ensure the target memberships are selected.
Add Your Font to info.plist
In your info.plist, you can add a reference to the font file you want to use in your application. It’s an array, so you can add as many fonts as your want under the “UIAppFonts” key. An example of what this would look like in the info.plist is as follows, where the imported font was MouldyCheese.ttf:
<plist version="1.0">
  <dict>
    <key>UIAppFonts</key>
    <array>
      <string>MouldyCheese.ttf</string>
    </array>
  </dict>
</plist>
The Code for Using a Custom Font
This code for this is available on GitHub and will be explained below.
import SwiftUI

struct ContentView: View {
  var body: some View {
    VStack {
      Text("Hello, world!")
        .font(Font.custom("MouldyCheese-Regular", size: 50))
        .foregroundColor(Color.green)
    }
    .padding()
  }
}
We start by importing SwiftUI. This enables us to define our UI declaratively using SwiftUI.
View
The ContentView is a struct that implements the View protocol. A View is a basic building block of the UI in SwiftUI and by conforming to the View protocol, ContentView is able to be used in place of a View. This means that ContentView can be used as part of user interfaces constructed using SwiftUI.
When a structure (or class) conforms to the View protocol, it needs to provide an implementation for the body property, which returns a SwiftUI View. The body property defines the content and layout of the view that will be displayed on the screen.
VStack Container View
The VStack is a container view that stacks its child views vertically, one on top of another. In this case, it contains one child view, which is the Text view. We place any views we want displayed on a page inside the VStack container view for this example. It has a .Padding() modifier attached to it. This modifier adds some padding around the VStack, which provides some space between the edges of the screen and the text.
Text View
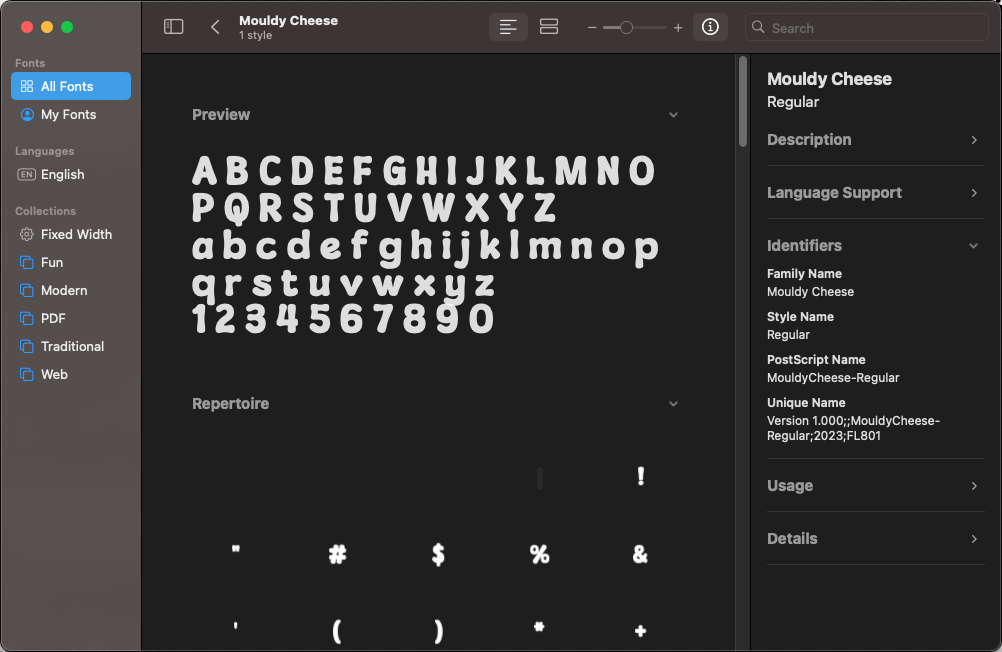
The Text view passes the text “Hello, world!” to its constructor. This means that “Hello, world!” will be displayed on screen. The following lines proceed to add some modifiers to the Text view and include setting a custom font to the custom font we imported. Please note we pass the PostScript Name when instantiating our custom font, in this case “MouldyCheese-Regular” which does not necessarily need to align with the name of your font file. You can find the PostScript font name in the Font Book App. We also specify we want the size of the font to be 50, and our final modifier sets the color of the text to green.
Common Errors
There are some common errors you might encounter when trying to use a custom font in an iOS App using SwiftUI. The first is, that if you notice above when creating my custom font I use a different name in the code than my file name. This is because you need to use the fonts PostScript name. You can find this PostScript Name in Font Book by selecting your font and going to the Identifiers section on the right of the app.
Another error you may encounter is if you are using an unsupported font file type extension. The TrueType Font (.ttf) extension works and the I am fairly confident the OpenType Font (.otf) also works. But if you are having difficulties getting your font to work it may be worth testing with a .ttf font to ensure that the file type is not causing any issues.
Still Not Working for You?
You can view the video tutorial for this on my MissCoding YouTube Channel.