
In the fast-paced world of software development, ensuring the quality of your code is paramount. The more complex your application becomes, the more critical it is to have a robust testing strategy in place. This is where automation testing and tools like GitHub Actions come into play. In this blog post, we’ll explore the benefits of incorporating automation tests into your development processes and how GitHub Actions can streamline this essential aspect of software development.
What is Automation Testing and Why is it Important?
Automation testing refers to the practice of using automated scripts and tools to execute test cases on a software application. Unlike manual testing, where testers manually interact with the application to identify bugs and issues, automation testing relies on predefined scripts that can be run repeatedly, consistently, and at any time.
The importance of automation testing can’t be overstated for the following reasons:
- Speed and Efficiency: Automation tests can execute a vast number of test cases much faster than human testers, allowing for quicker feedback during development.
- Consistency: Automated tests run the same way every time, eliminating the variability inherent in manual testing.
- Reusability: Test scripts can be reused for different versions of the application, reducing duplication of effort.
- Continuous Integration: Automation tests are an integral part of a continuous integration (CI) pipeline, ensuring that code changes are thoroughly tested before merging into the main branch.

What is a GitHub Action?
GitHub Actions is a powerful automation tool provided by GitHub that allows you to define custom workflows for your software development projects. These workflows can be triggered by various events, such as code pushes, pull requests, or manual triggers, and they automate various tasks, including building, testing, and deploying your code.
GitHub Actions uses YAML files to define workflows, making it easy to integrate and automate various aspects of your development process.
Benefits of Including Automation Testing in Your GitHub Action
Now that we understand the basics, let’s explore the specific advantages of integrating automation testing into your GitHub Actions workflow:
- Continuous Testing: By including automated tests in your GitHub Actions workflow, you ensure that every code change is automatically tested. This catches issues early in the development process, reducing the likelihood of bugs reaching production.
- Faster Feedback: GitHub Actions can execute automated tests quickly, providing immediate feedback to developers. This speed accelerates the development cycle by allowing issues to be addressed promptly.
- Enhanced Collaboration: Automation testing in GitHub Actions encourages collaboration between development and QA teams. Developers can create and maintain test scripts, while QA teams can focus on more complex and exploratory testing.
- Enhanced Collaboration: Automation testing in GitHub Actions encourages collaboration between development and QA teams. Developers can create and maintain test scripts, while QA teams can focus on more complex and exploratory testing.
Practical Example: Automating Jest Tests for a React Native App
I’ll now share how to automate the running of jest tests for a react native app on push, pull request creation and manual workflow trigger. This code assumes you already have automation tests setup to run and are using npm to install and run your tests. Your package.json should include a corresponding test command. For an example of this you can check the repository I have setup for demonstrating this on GitHub.
name: Test React Native App

on:
  pull_request:
  workflow_dispatch:
  push:
    branches: [main]

jobs:
  unit-test:
    name: Run Tests
    runs-on: ubuntu-latest
    steps:
      - uses: actions/checkout@v2
      - uses: actions/setup-node@v1
        with:
          node-version: "14"
      - run: npm install
      - run: npm run test
This YAML code represents a GitHub Actions workflow for testing a React Native application. Let’s break it down step by step:
name: Test React Native App: This is the name of the GitHub Actions workflow. It’s a user-friendly label to help identify the workflow.on:: This section specifies the events that trigger this workflow. In this case, the workflow is triggered when there is a pull request, a manual workflow dispatch, or a code push to themainbranch.jobs:: This section defines the individual jobs that make up the workflow. In this case, there’s one job namedunit-test.name: Run Tests: This is the name of the job, indicating that its purpose is to run tests.runs-on: ubuntu-latest: This specifies that the job should run on the latest version of the Ubuntu operating system provided by GitHub Actions.steps:: These are the individual steps that the job consists of.uses: actions/checkout@v2: This step checks out the source code repository into the runner, allowing subsequent steps to access and work with the code.uses: actions/setup-node@v1: This step sets up the Node.js environment on the runner and specifies that Node.js version 14 should be used.run: npm install: This step installs project dependencies using the Node Package Manager (npm).run: npm run test: This step runs the actual tests for the React Native application using the defined npm script.
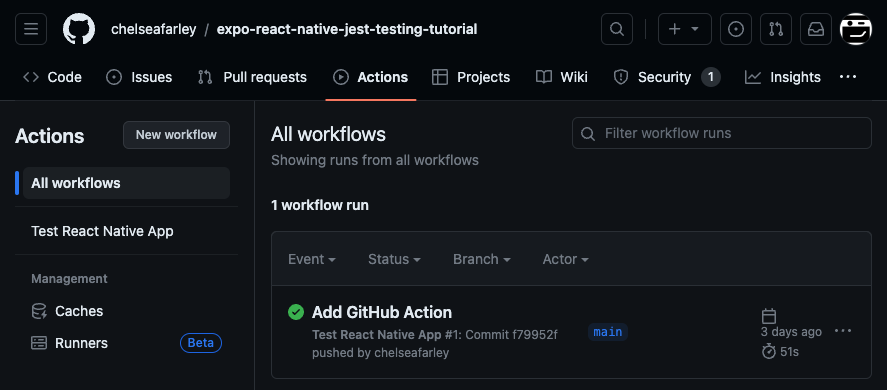
This code will automatically become a GitHub Action when in a yml file checked into the repo under the folder ".github/actions". Upon a trigger, the action will start running and outputs can be viewed on the GitHub website.
It might be worth noting, your personal access token that you use to commit to git will need to include the workflows permission, otherwise you will get a permissions error when trying to push your changes. You can update your personal access token or just check-in the workflow via the GitHub website.
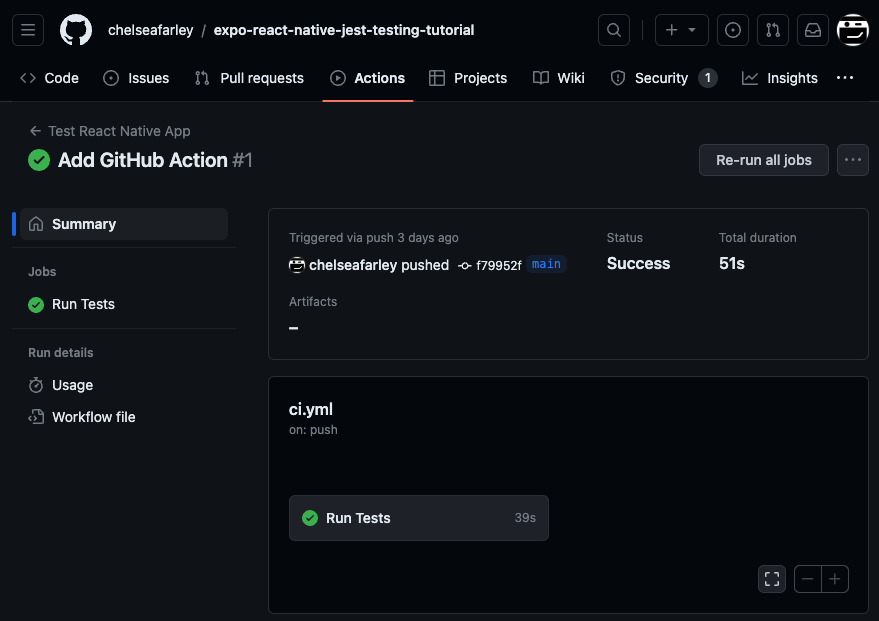
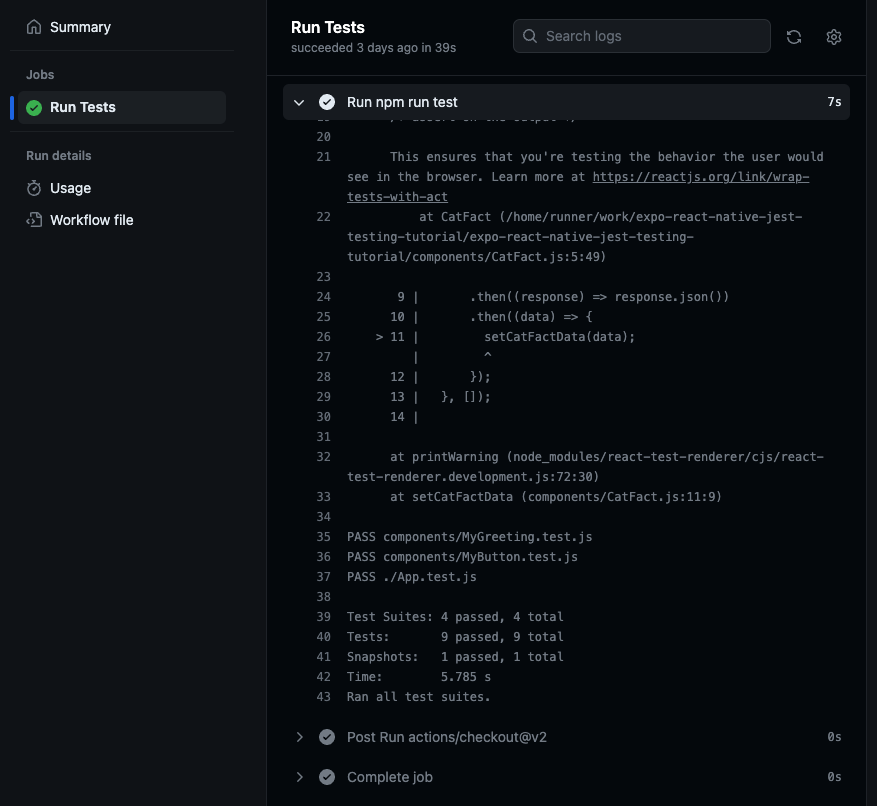
Once your GitHub action has run you can drill down into its Steps and Jobs in more detail:
Prefer a Video Walkthrough?
I demonstrate how to set this up and achieve this over on my MissCoding YouTube channel. So if you are still stuck or would like to see it in action, you can head on over there!
Conclusion
Incorporating automation testing into your development processes through GitHub Actions can significantly improve the quality and efficiency of your software development lifecycle. The benefits include continuous testing, faster feedback, enhanced collaboration, and increased confidence in your code. By automating your tests, you can catch and fix issues earlier, leading to more reliable and robust software applications. So, don’t wait—start automating your tests with GitHub Actions today to reap these advantages and deliver better software to your users.
If you’ve enjoyed this article, you may also enjoy my other tech blogs or my MissCoding YouTube channel! You can check out my code over on GitHub and follow me to get an early idea of what videos or articles will be coming next. Additionally, if you have enjoyed my content please support my continued content creation by donating via Stripe.